> ## Documentation Index
> Fetch the complete documentation index at: https://docs.libredesk.io/llms.txt
> Use this file to discover all available pages before exploring further.
# Connecting Inboxes
> Connect email inboxes using Google, Microsoft OAuth, or manual IMAP/SMTP configuration
Libredesk supports three methods for connecting email inboxes: Google OAuth, Microsoft OAuth, and manual IMAP/SMTP configuration with password authentication.
## Google setup
Connect your Gmail or Google Workspace inbox using OAuth 2.0 or an app password.
### OAuth
#### Prerequisites
* A Google Cloud Console project
* OAuth 2.0 credentials (Client ID & Client Secret)
#### Required OAuth scopes
When configuring your Google OAuth app, the following scopes are required:
| Scope | Purpose |
| ------------------------------------------------ | ------------------------------------------------ |
| `https://mail.google.com/` | Full Gmail access for reading and sending emails |
| `https://www.googleapis.com/auth/userinfo.email` | Access to user's email address |
#### Configuration steps
In Libredesk, go to Admin → Inboxes → New inbox → Google. A dialog will open with the **Callback URL**, copy this URL.
Go to the [Google Cloud Console](https://console.cloud.google.com/) and create a new project or select an existing one.
In your project, navigate to APIs & Services → Library and enable the Gmail API.
Set up the OAuth consent screen with the required scopes listed above.
Go to APIs & Services → Credentials and click Create Credentials → OAuth client ID:
* Application type: Web application
* Add the callback URL from step 1 to Authorized redirect URIs
* Note down the Client ID and Client Secret
Back in the Libredesk dialog, enter the Client ID and Client Secret, then click Authorize. You'll be redirected to Google's consent screen to grant permissions.
### App password
If you'd rather skip the Google Cloud Console, you can connect Gmail using a 16-character app password instead. Your Google account must have [2-Step Verification](https://myaccount.google.com/signinoptions/twosv) enabled for this option to be available.
Visit [myaccount.google.com/apppasswords](https://myaccount.google.com/apppasswords), name the app (e.g. `Libredesk`), and copy the generated 16-character password.
Go to Admin → Inboxes → New inbox → **Other provider** and use these settings:
**IMAP**
| Field | Value |
| -------- | ---------------------------- |
| Host | `imap.gmail.com` |
| Port | `993` |
| TLS | SSL/TLS |
| Username | Your full Gmail address |
| Password | The app password from step 1 |
**SMTP**
| Field | Value |
| ----------------------- | ---------------------------- |
| Host | `smtp.gmail.com` |
| Port | `587` |
| TLS | STARTTLS |
| Authentication Protocol | PLAIN |
| Username | Your full Gmail address |
| Password | The app password from step 1 |
## Microsoft setup
Connect your Outlook or Microsoft 365 inbox using OAuth 2.0.
### Prerequisites
* An Azure Active Directory (Azure AD) app registration
* OAuth 2.0 credentials (Client ID & Client Secret)
### Required API permissions
Add the following **Microsoft Graph** delegated permissions in Azure Portal:
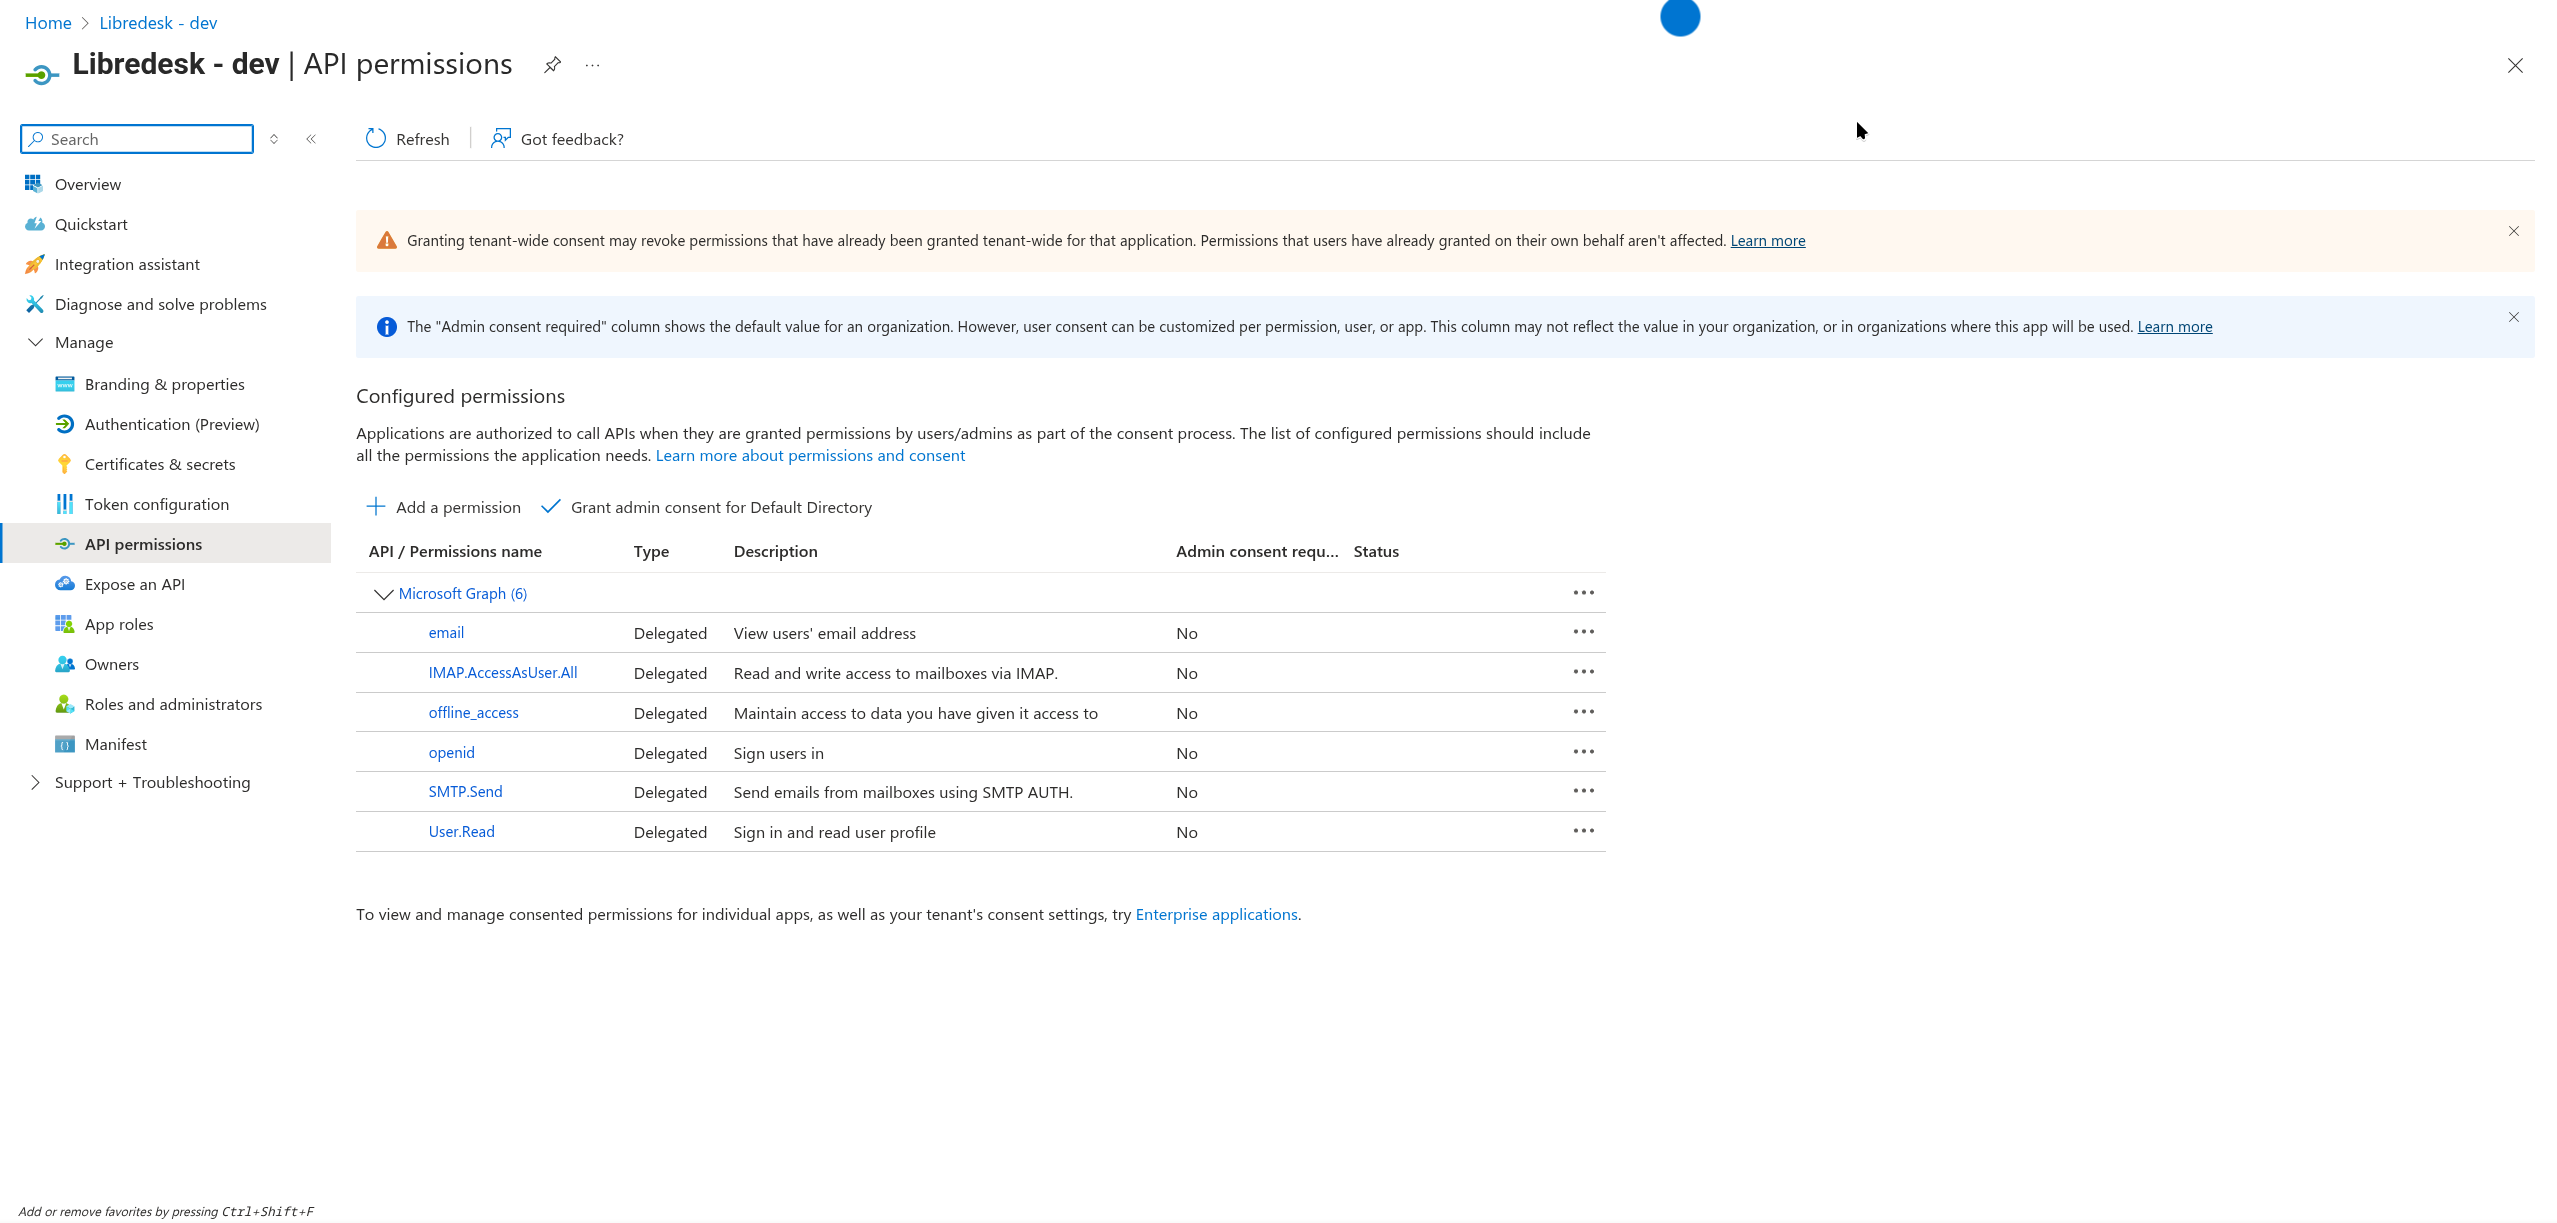 | Permission | Type | Description |
| --------------------- | --------- | --------------------------------------------------- |
| email | Delegated | View users' email address |
| IMAP.AccessAsUser.All | Delegated | Read and write access to mailboxes via IMAP |
| offline\_access | Delegated | Maintain access to data you have given it access to |
| openid | Delegated | Sign users in |
| SMTP.Send | Delegated | Send emails from mailboxes using SMTP AUTH |
| User.Read | Delegated | Sign in and read user profile |
### Configuration steps
In Libredesk, go to Admin → Inboxes → New inbox → Microsoft. A dialog will open with the **Callback URL** - copy this URL.
Go to the [Azure Portal](https://portal.azure.com/) → Azure Active Directory → App registrations → New registration:
* Enter a name for your application
* Select the appropriate account type (single tenant or multi-tenant)
* Add the callback URL from step 1 as the Redirect URI
In your app registration, go to API permissions → Add a permission → Microsoft Graph:
* Add all the delegated permissions shown in the table above
* Click Grant admin consent for Default Directory
Go to Certificates & secrets → New client secret:
* Add a description and expiration period
* Copy the secret value immediately (it won't be shown again)
From the Overview page, copy:
* Application (client) ID
* Directory (tenant) ID (if using single-tenant)
Back in the Libredesk dialog, enter the Client ID, Client Secret, and Tenant ID (optional), then click Authorize. You'll be redirected to Microsoft's consent screen to grant permissions.
## Manual IMAP/SMTP setup
For self-hosted mail servers or providers that don't support OAuth, use manual IMAP/SMTP configuration.
### When to use
* Self-hosted mail servers
* Email providers without OAuth support
For Gmail specifically, see the [App password](#app-password) option under Google setup.
### Configuration steps
Navigate to Admin → Inboxes → New inbox → Other provider, configure IMAP and SMTP settings, then click Save.
| Permission | Type | Description |
| --------------------- | --------- | --------------------------------------------------- |
| email | Delegated | View users' email address |
| IMAP.AccessAsUser.All | Delegated | Read and write access to mailboxes via IMAP |
| offline\_access | Delegated | Maintain access to data you have given it access to |
| openid | Delegated | Sign users in |
| SMTP.Send | Delegated | Send emails from mailboxes using SMTP AUTH |
| User.Read | Delegated | Sign in and read user profile |
### Configuration steps
In Libredesk, go to Admin → Inboxes → New inbox → Microsoft. A dialog will open with the **Callback URL** - copy this URL.
Go to the [Azure Portal](https://portal.azure.com/) → Azure Active Directory → App registrations → New registration:
* Enter a name for your application
* Select the appropriate account type (single tenant or multi-tenant)
* Add the callback URL from step 1 as the Redirect URI
In your app registration, go to API permissions → Add a permission → Microsoft Graph:
* Add all the delegated permissions shown in the table above
* Click Grant admin consent for Default Directory
Go to Certificates & secrets → New client secret:
* Add a description and expiration period
* Copy the secret value immediately (it won't be shown again)
From the Overview page, copy:
* Application (client) ID
* Directory (tenant) ID (if using single-tenant)
Back in the Libredesk dialog, enter the Client ID, Client Secret, and Tenant ID (optional), then click Authorize. You'll be redirected to Microsoft's consent screen to grant permissions.
## Manual IMAP/SMTP setup
For self-hosted mail servers or providers that don't support OAuth, use manual IMAP/SMTP configuration.
### When to use
* Self-hosted mail servers
* Email providers without OAuth support
For Gmail specifically, see the [App password](#app-password) option under Google setup.
### Configuration steps
Navigate to Admin → Inboxes → New inbox → Other provider, configure IMAP and SMTP settings, then click Save.
Live chat
For live chat widget setup, see the [Live Chat](/configuration/livechat) guide.