Google setup
Connect your Gmail or Google Workspace inbox using OAuth 2.0 or an app password.OAuth
Prerequisites
- A Google Cloud Console project
- OAuth 2.0 credentials (Client ID & Client Secret)
Required OAuth scopes
When configuring your Google OAuth app, the following scopes are required:| Scope | Purpose |
|---|---|
https://mail.google.com/ | Full Gmail access for reading and sending emails |
https://www.googleapis.com/auth/userinfo.email | Access to user’s email address |
Configuration steps
Get callback URL from Libredesk
In Libredesk, go to Admin → Inboxes → New inbox → Google. A dialog will open with the Callback URL, copy this URL.
Create a Google Cloud project
Go to the Google Cloud Console and create a new project or select an existing one.
Configure OAuth consent screen
Set up the OAuth consent screen with the required scopes listed above.
Create OAuth credentials
Go to APIs & Services → Credentials and click Create Credentials → OAuth client ID:
- Application type: Web application
- Add the callback URL from step 1 to Authorized redirect URIs
- Note down the Client ID and Client Secret
App password
If you’d rather skip the Google Cloud Console, you can connect Gmail using a 16-character app password instead. Your Google account must have 2-Step Verification enabled for this option to be available.Generate an app password
Visit myaccount.google.com/apppasswords, name the app (e.g.
Libredesk), and copy the generated 16-character password.Add inbox in Libredesk
Go to Admin → Inboxes → New inbox → Other provider and use these settings:IMAP
SMTP
| Field | Value |
|---|---|
| Host | imap.gmail.com |
| Port | 993 |
| TLS | SSL/TLS |
| Username | Your full Gmail address |
| Password | The app password from step 1 |
| Field | Value |
|---|---|
| Host | smtp.gmail.com |
| Port | 587 |
| TLS | STARTTLS |
| Authentication Protocol | PLAIN |
| Username | Your full Gmail address |
| Password | The app password from step 1 |
Microsoft setup
Connect your Outlook or Microsoft 365 inbox using OAuth 2.0.Prerequisites
- An Azure Active Directory (Azure AD) app registration
- OAuth 2.0 credentials (Client ID & Client Secret)
Required API permissions
Add the following Microsoft Graph delegated permissions in Azure Portal: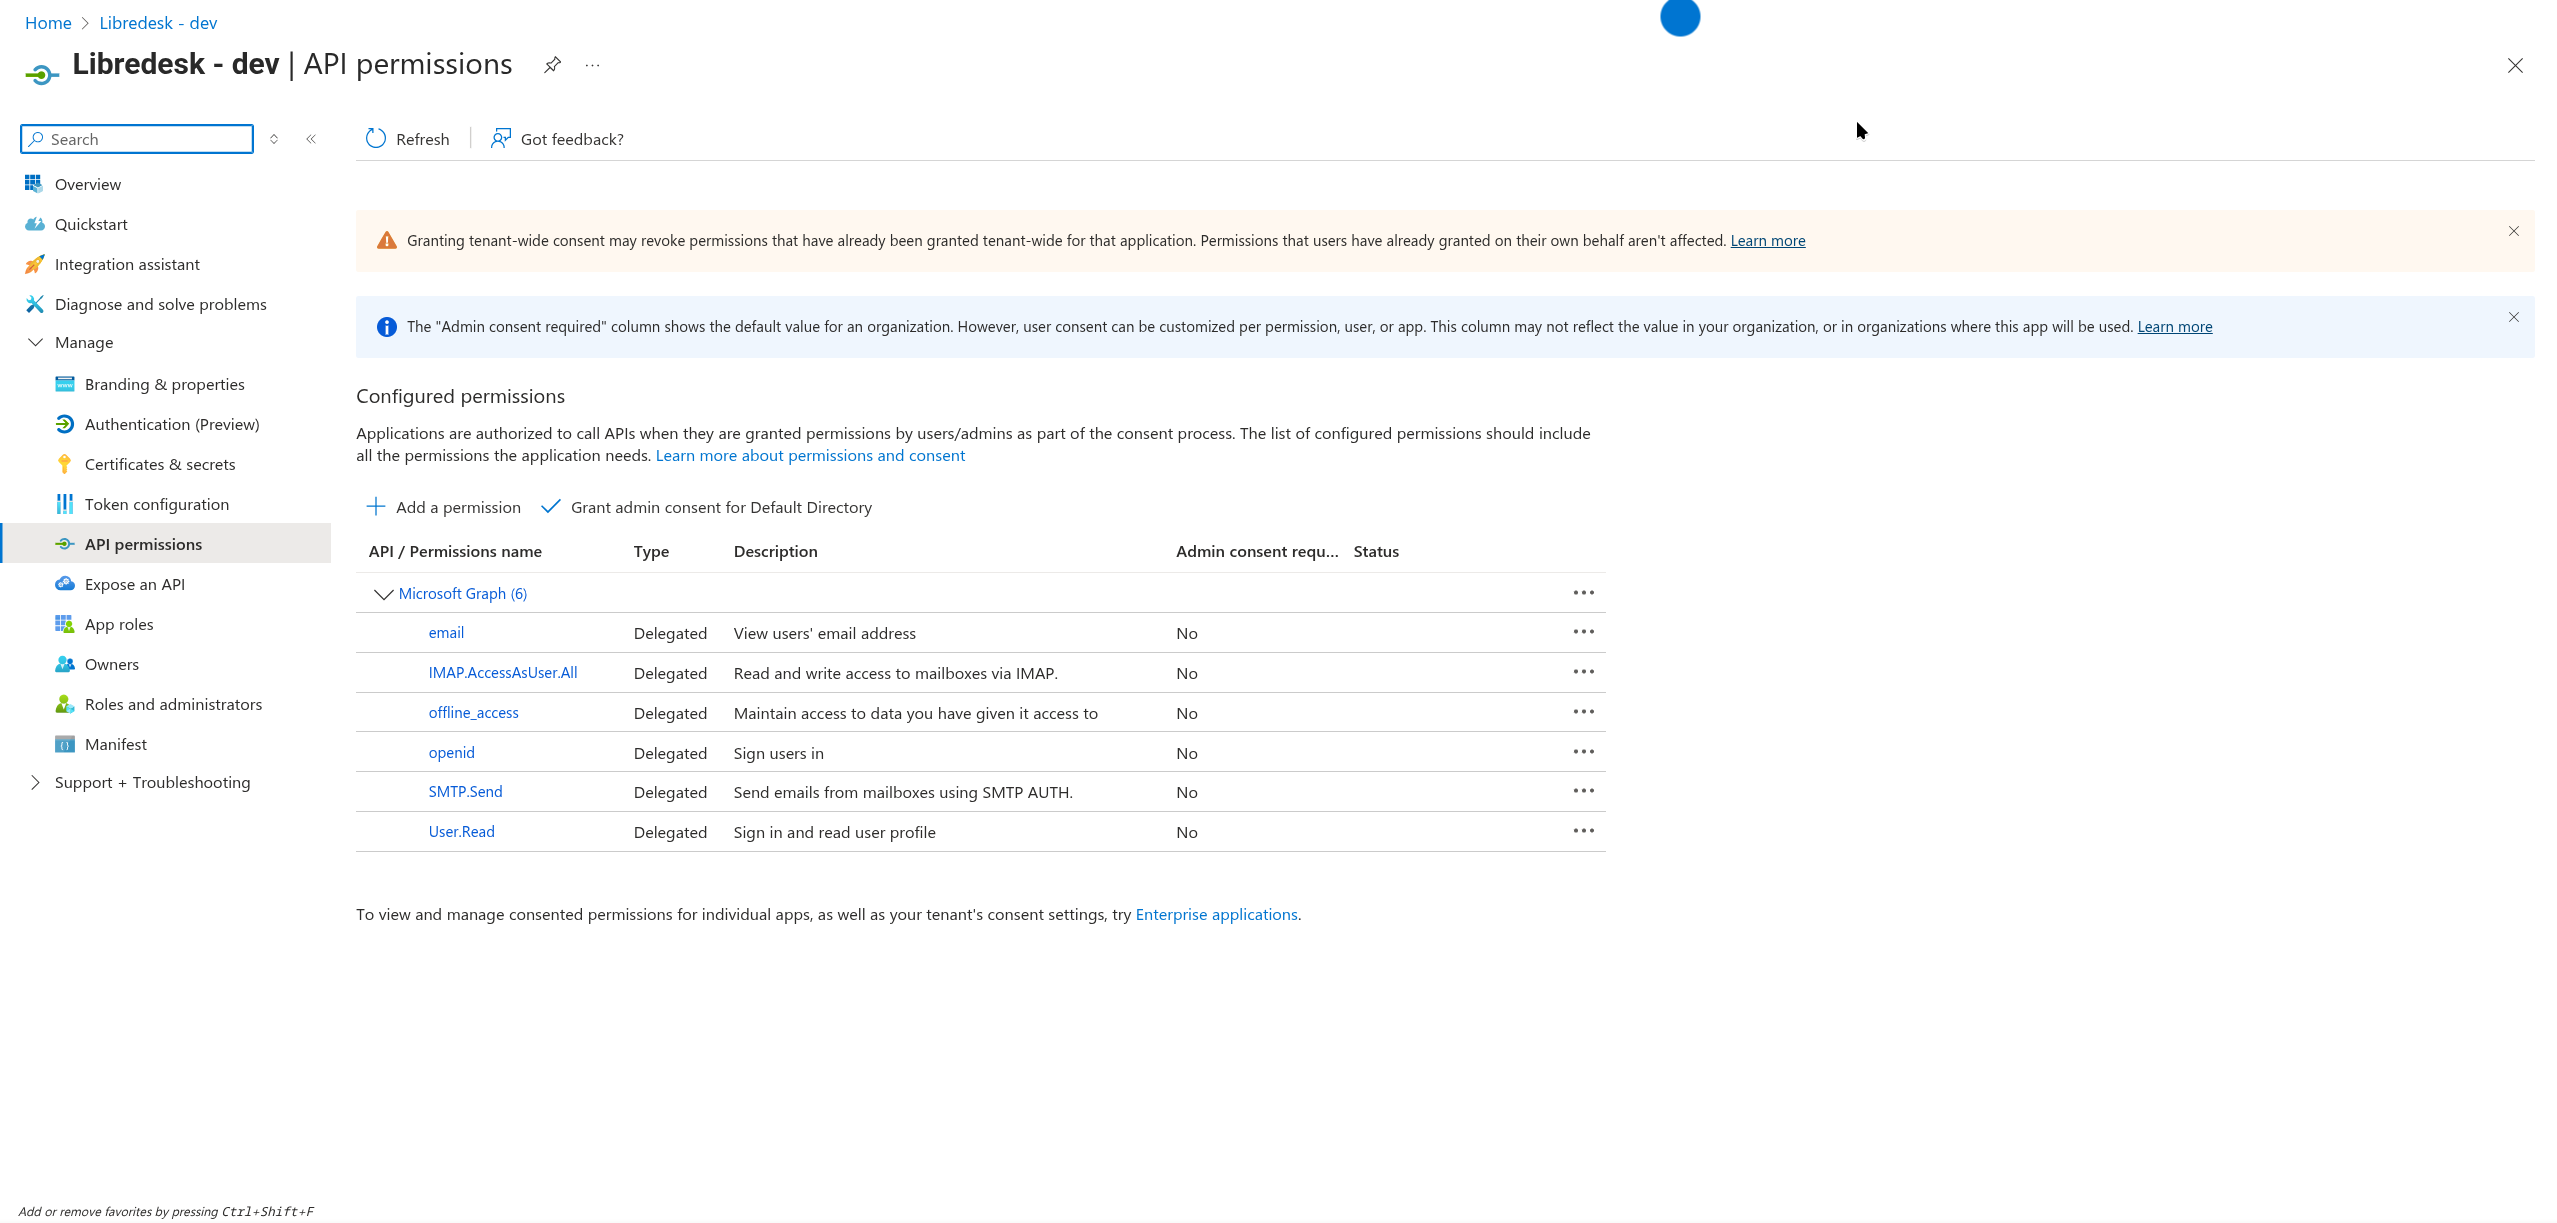
| Permission | Type | Description |
|---|---|---|
| Delegated | View users’ email address | |
| IMAP.AccessAsUser.All | Delegated | Read and write access to mailboxes via IMAP |
| offline_access | Delegated | Maintain access to data you have given it access to |
| openid | Delegated | Sign users in |
| SMTP.Send | Delegated | Send emails from mailboxes using SMTP AUTH |
| User.Read | Delegated | Sign in and read user profile |
Configuration steps
Get callback URL from Libredesk
In Libredesk, go to Admin → Inboxes → New inbox → Microsoft. A dialog will open with the Callback URL - copy this URL.
Register an app in Azure Portal
Go to the Azure Portal → Azure Active Directory → App registrations → New registration:
- Enter a name for your application
- Select the appropriate account type (single tenant or multi-tenant)
- Add the callback URL from step 1 as the Redirect URI
Configure API permissions
In your app registration, go to API permissions → Add a permission → Microsoft Graph:
- Add all the delegated permissions shown in the table above
- Click Grant admin consent for Default Directory
Create client secret
Go to Certificates & secrets → New client secret:
- Add a description and expiration period
- Copy the secret value immediately (it won’t be shown again)
Note your credentials
From the Overview page, copy:
- Application (client) ID
- Directory (tenant) ID (if using single-tenant)
Manual IMAP/SMTP setup
For self-hosted mail servers or providers that don’t support OAuth, use manual IMAP/SMTP configuration.When to use
- Self-hosted mail servers
- Email providers without OAuth support